

Created or found a skill that you like? Why not test & evaluate it for effectiveness? We can do this in two ways with the Tessl CLI:
- Testing against best practices using
tessl skill lintandtessl skill review - Using scenarios to validate quality using
tessl skill eval
In this article we will discuss using these methods to improve your tile, with examples. While publishing will generate reviews automatically, being able to run these during development of your skill allows you to improve it while you are working on it!
If you want to try these commands out, you can either create your own skill from scratch, or use an existing one then modify it.
Install the Tessl CLI
Install the Tessl CLI and initialize it with the following commands in your project folder for the skill:
Install
curl -fsSL [https://get.tessl.io](https://get.tessl.io/) | sh
Setup Tessl
tessl login
Initialize your project
tessl init
For more information and alternative installation methods, see the Tessl installation documentation.
Creating or searching for a skill
Create a skill
In a new project folder, use the Tessl cli, run tessl skill new. Respond to the prompts.
More information can be found here: https://docs.tessl.io/create/creating-skills.
Find a Skill
If you are creating a skill from scratch skip to the next section. Otherwise you can find an existing one by using one of the following methods in a new project folder:
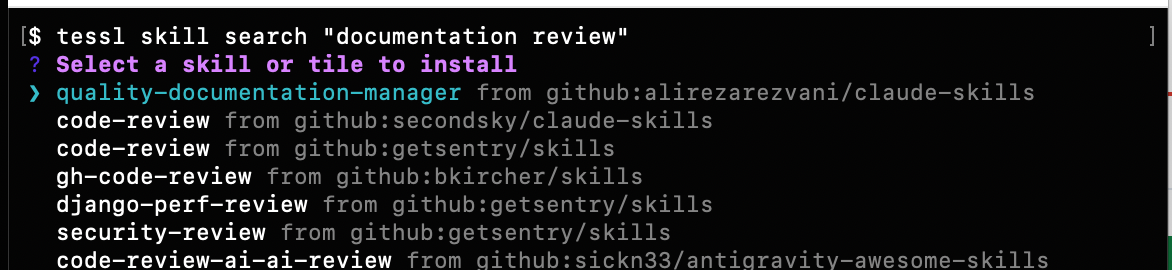
Method 1: CLI - Terminal search
Use the CLI command tessl skill search <skill> or ask your agent to find one. If you use an agent, be sure to run the tessl init in your project folder prior to launching your agent. If your agent isn’t listed, you can find more information here to help setup your agent.
Running the search will result in the ability to select which skill to install locally from the search results.
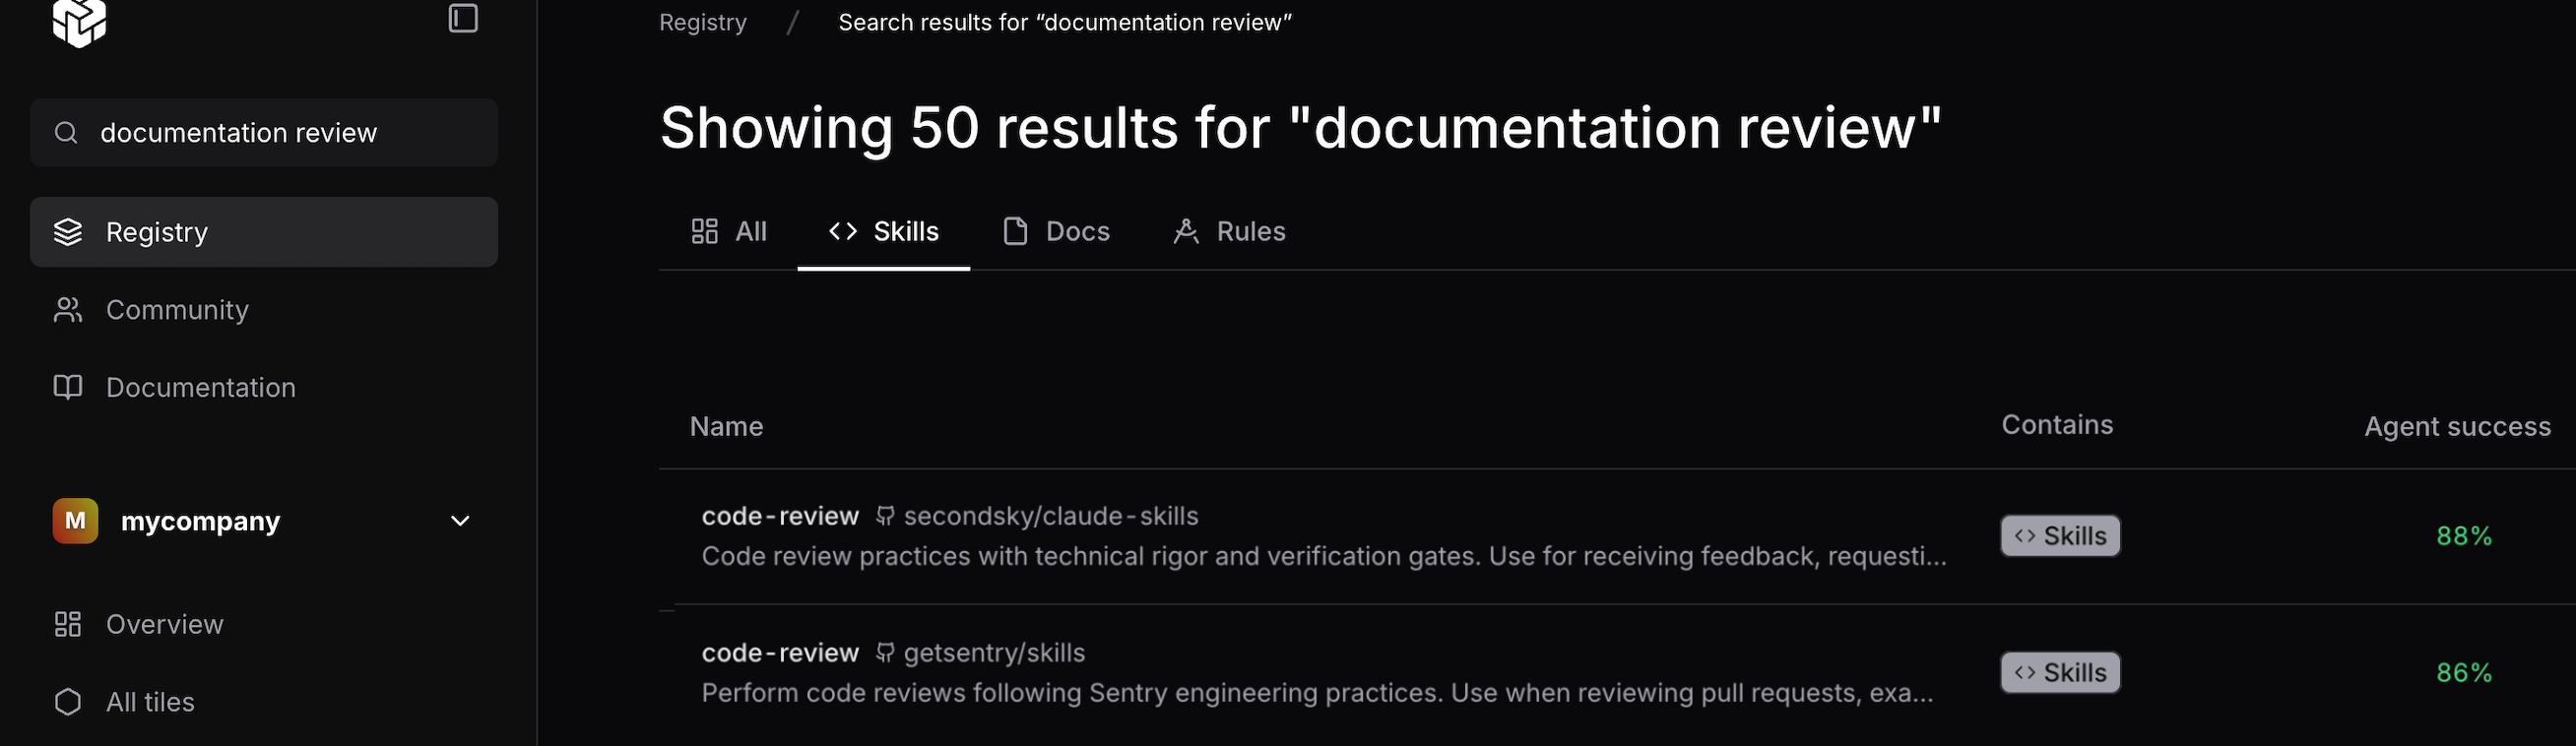
Method 2: Tessl registry site
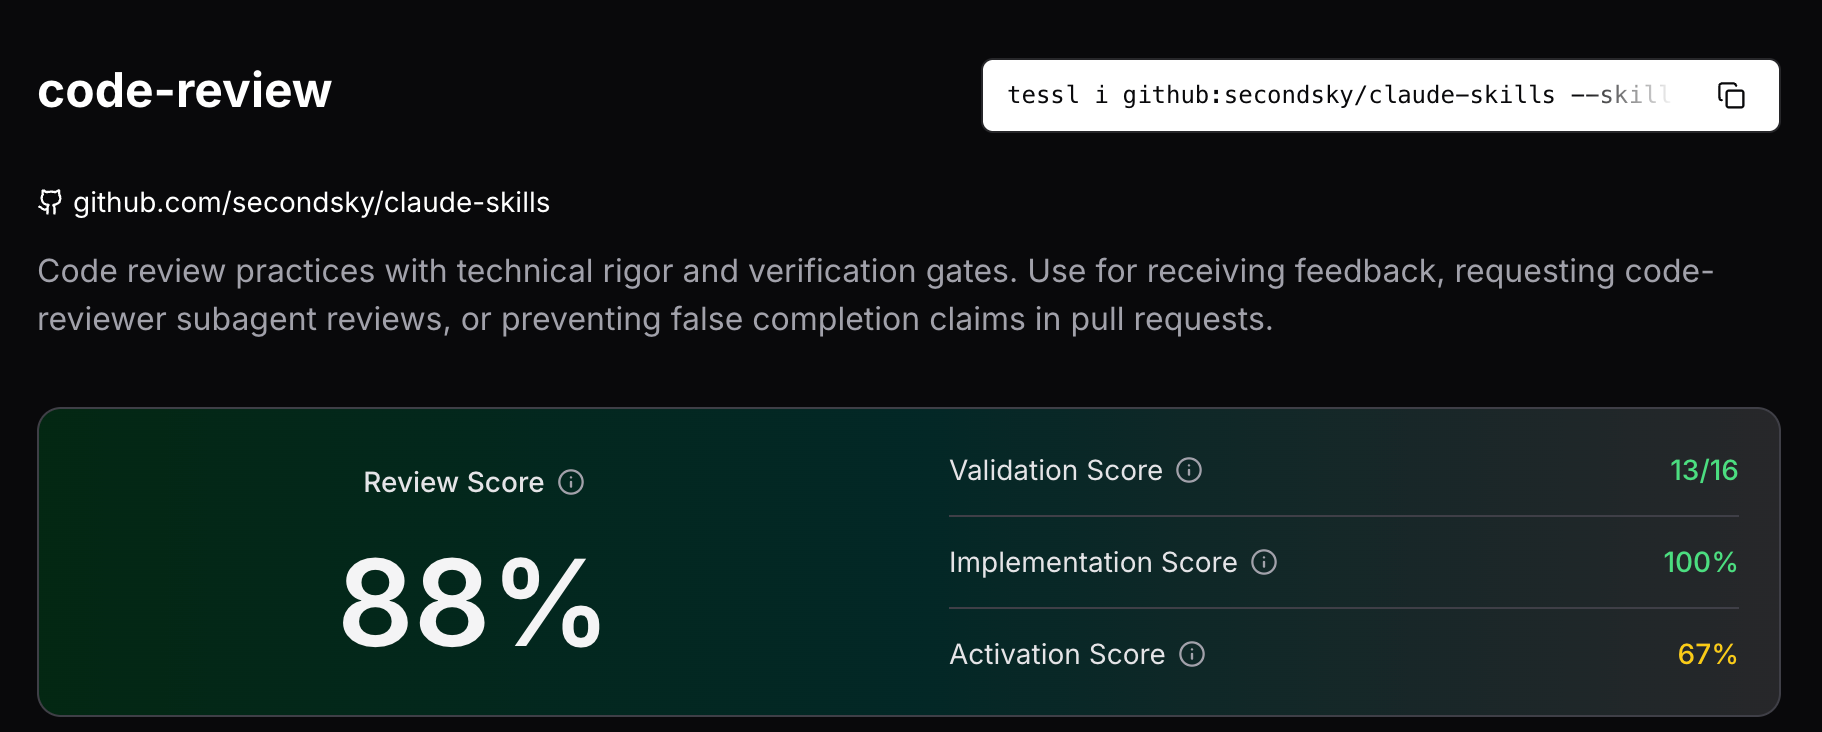
Alternatively, use the Tessl site: https://tessl.io/registry to search for a skill and install it using the command displayed on the top right from the Skills tab. In this example we see a command starting with “tessl i github:”, where the entire command would be run locally.
Method 3: GitHub
Another alternative is to use a skill found on GitHub, clone it, and use the CLI command tessl skill import
to
create a tile.json for the skill you found. Here's an example of the full command:
tessl skill import ./<myskilldir> --workspace <myworkspace>
Note that prior to publishing your skill, you will need to update tile.json to point to your workspace by updating the name to <yourworkspace>/<skillname>.
Modifying the skill
Once the skill is created or downloaded, navigate to your project folder, and open /tiles/<skill>. Here you will find the configuration files and the content of the skill. Change anything you like, and once you’re ready, you can test the effectiveness and quality of your skill.
A lot of great best practices can be found on the Claude API docs - Agent Skills best practices page to further assist you in skill creation, a lot of these are encoded in the skills review tool your skill will be graded against.
Lint, review and evaluate your skill
There are three methods available to validate your skill:
- Lint your package for publishing, looking for metadata and packaging errors.
- Review package against best practices for skills.
- Generate and evaluate scenarios against your skill to determine the quality.
Review your Skill against best practices
Before publishing, validate your skill structure and contents. To review your skill contents:
Review
Use tessl skill review <path to SKILL.md> or change directory to that folder and use tessl skill review. You can rerun the command as you address issues to verify the issues are resolved.
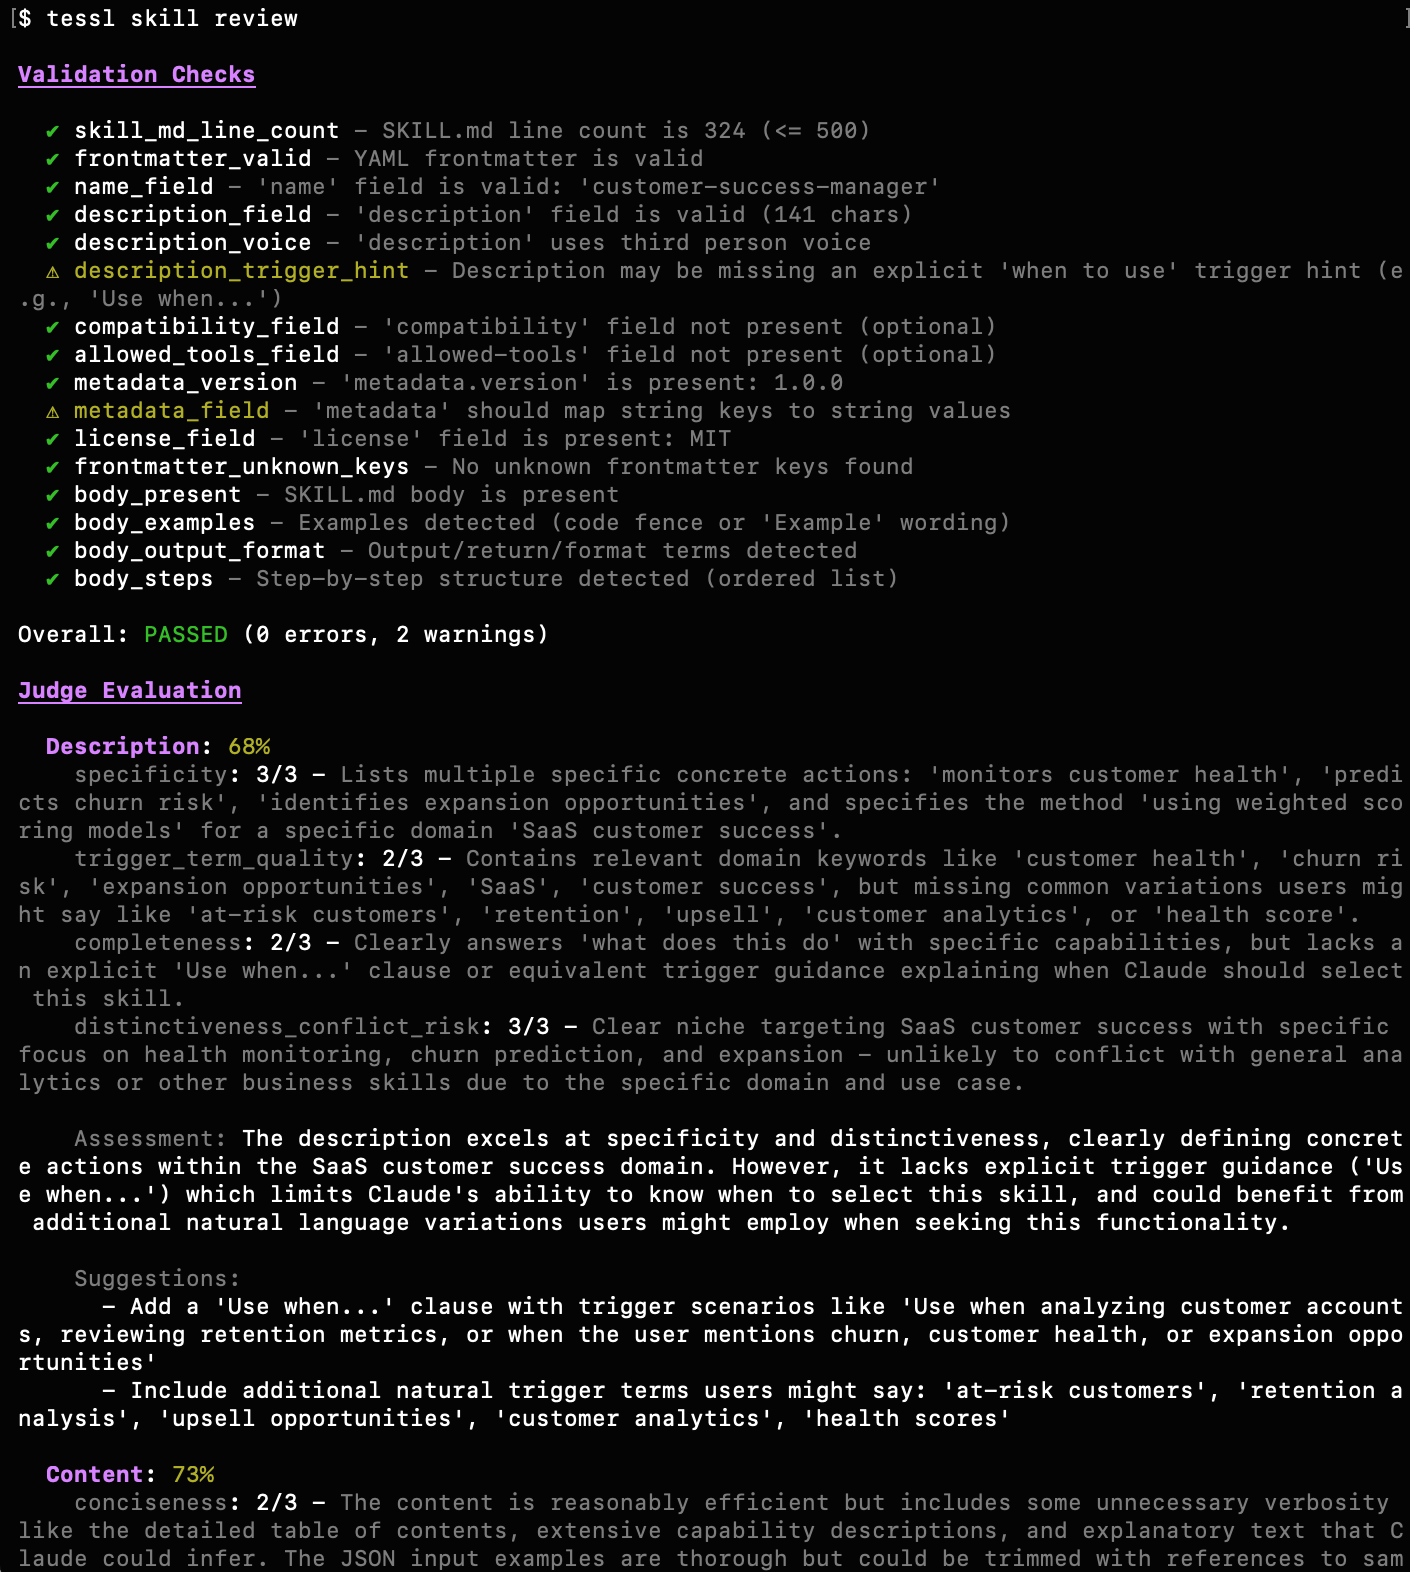
In the example above we see there was one of the most common issues with skills from the review. When looking at the Description, which impacts the ability to trigger the skill when needed, it was only 68% effective. Simply addressing it by using the suggestion provided for “Use when” phrasing, we address the trigger_term_quality and completeness, moving it closer to 100%. After addressing each of the findings, rerun the review to determine how much the quality has improved!
Lint
Almost ready to publish?
- Let’s also run
tessl skill lintortessl skill lint ./<your skill>to check the packaging of your skill.
Example:

In this example we see issues with linking to files that are ignored that were included and need to be addressed.
The lint command checks:
- SKILL.md format and structure
- Required frontmatter fields (name, description)
- Conformance to the Agent Skills specification
- Markdown validity
After addressing the issues, rerun the tessl skill lint command to verify.
Evaluate quality using scenarios
Once you've built your skill, the final step before publishing is to create scenarios your skill can be evaluated against.
From your project folder, install the skill that generates scenarios:tessl install tessl-labs/tessl-skill-eval-scenarios
Generate the scenarios
Scenarios can be created manually or automatically, and the following steps will explore the automatic creation methodology. More information on manual creation can be found here.
Prompt your agent (e.g. Claude):"Create tessl eval scenarios for <my skill>"
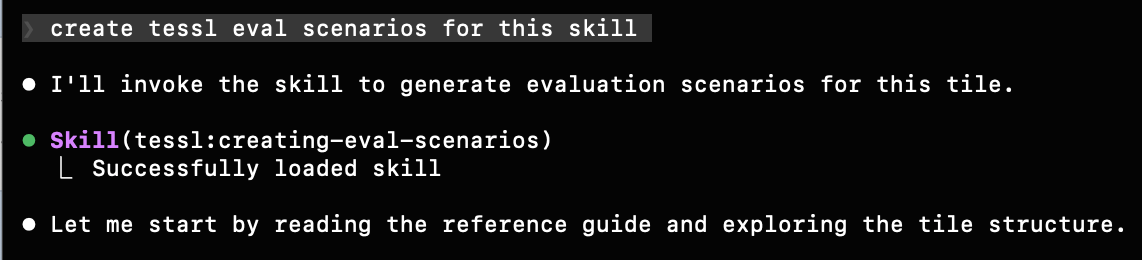
This will:
1. Verify Tessl installation
2. Convert your skill to a tile (if it is not already in one), this is a necessary prerequisite to running evaluations
3. Generate an initial set of scenarios
Review and update eval scenarios
Each scenario contains:
- `capability.text` containing which capabilities of the skill this scenario is testing.
- `TASK.md` containing a task for an agent to solve.
- `criteria.json` describing the way an agent's solution to the task will be graded.
Tessl auto generates these, but for best results we recommend reviewing these yourself and editing them to your preferences. You are the ultimate authority on what your skill is intended to do and what success using it looks like!
Expert tip
Automatic scenario generation creates criteria that reflect the instructions in the skill, it is recommended that you review these and check they reflect the outcomes you want the skill to achieve.
Update tile.json
These were set in earlier steps, but it is best practice to open tile.json in your skill folder and ensure the workspace name is updated to a workspace you have publisher right on, and verify the tile name you have chosen. The name field is in the form of <workspace>/<skill>
// Before

{ "name": "placeholder/tessl-docs-creator", ... }

// After

{ "name": "mycompany/tessl-docs-creator", ... }
Note that the workspace you use must be one you belong to and have the correct permissions for. Otherwise, you will not be able to publish or run evals against it.
Run the evaluation
- From the parent directory of the tile:
tessl eval run <tile> - You'll receive a URL in the terminal output/CLI, similar to what is shown below, to monitor progress and view results in the Tessl web UI.

- The id for the next step can be extracted from that view-results URL (i.e. 019c4791-9eec-7458-b28a-6c94405a3d38)
Review your results
Eval runs can take time. Use any of these to check status:
- Visit the URL displayed in the previous section
tessl eval <id>- View a specific eval runtessl eval view --last- Last eval run with IDs and statustessl eval list- List all eval runs with IDs and statustessl eval view <id> --json- Structured details on the eval runtessl eval retry <id>- Retry a failed eval run
If you lose the id for your eval run, simply run tessl eval list to easily find it again.
Example output from tessl eval list:

It's not uncommon for an attempt to not succeed on solving the eval scenario. You can either adjust the scenario or retry the scenario using tessl eval retry <id>.
Example output from a skill eval usingtessl eval view <id>:Scenario 5: Quickstart user prompting and practical examplesBaseline (without context)
Check Score
---------------------------------------
User consultation 40/40 (100%)
Practical example 0/25 (0%)
Feature documented 20/25 (100%)
---------------------------------------
Total 60/100 (60%)
With context
Check Score
-----------------------------------------
User consultation 40/40 (100%)
Practical example 25/25 (100%)
Feature documented 20/25 (100%)
-----------------------------------------
Total 100/100 (100%)
For more information, see:
Publishing your skill
Once you publish your skill, linting and review will automatically be run, notifying you of any unresolved packaging problems, and the eval will be available from the web interface.
For evals using scenarios, it's important to note that since your skill was converted to a tile, you can now manage it at the tile level using the CLI. To publish your tile to the Tessl registry, a new eval will only be run if you have not run an eval previously or if the content of your tile has changed since the last eval run:
As a best practice, always review the following before publishing:
- Tile.json
- Ensure the “name” field for your skill points to your workspace
<workspace>/name of your skill - Set the “version” field number to a new version number
- Decide if it’s public or private. If “Public” is the desired approach, after publishing, you will need to go to the web interface to request to make it public and update this field in your skill.
- Ensure the “name” field for your skill points to your workspace
When you are ready, run the following command to publish your skill
tessl skill publish

